The brightest light isn’t necessarily the best one for camp. A lantern may suit a quiet evening, while cooking, packing or setting up under an awning calls for a different beam and position. Good 4×4 camp lighting matches the task, campsite layout and power available. Focus on brightness alone and you can end up with glare, awkward shadows or an unexpected drain on your auxiliary battery.
Choosing between a lantern, strip light, work light or vehicle-mounted option can be tricky because each has a different purpose and power demand. This guide explains how to match lighting to campsite tasks, plan placement around your vehicle and estimate power use for trips around New Zealand.
We’ll cover lighting for cooking, relaxing and vehicle tasks, along with ways to reduce glare and keep your setup organised. You’ll also learn how camp lighting differs from driving lights and what to consider before mounting lights to a vehicle. Motortech 4X4 supplies and installs vehicle lighting and camping gear, helping you plan a practical setup around your vehicle.
Key Takeaways
- Match each light type to its job, from portable lanterns to fixed work lights, and consider how each covers your campsite.
- Sketch your vehicle, tent, cooking area and walkways to plan useful coverage and minimise glare.
- Estimate power needs by listing each light’s wattage and expected hours of use, then calculating energy consumption.
- Keep 4×4 camp lighting separate from driving lights when choosing equipment and planning how you’ll use it.
- Plan lighting alongside camping gear and vehicle fit-out choices for a setup that suits your trips.
What 4×4 camp lighting does, and how it differs from driving lights
4×4 camp lighting is for use around a stationary campsite. It helps you see the cooking area, find gear in the vehicle, pack up after dark and move around without relying on one harsh beam. For New Zealand touring, plan around how you use camp: the vehicle, tent, cooking space and paths between them each have different lighting needs.
Brightness is only part of the job. A powerful light aimed across camp can cause glare, while a light behind you may cast your shadow over the task. Useful coverage depends on placing each light where it helps, controlling its direction and using a softer, broader source for shared spaces.
Which campsite activities need their own light?
Cooking, sorting equipment and checking inside a canopy all need light directed onto the work area. A small task light or a strip near the storage space can keep the beam focused. Relaxing or walking between the vehicle and tent calls for broader, more even coverage.
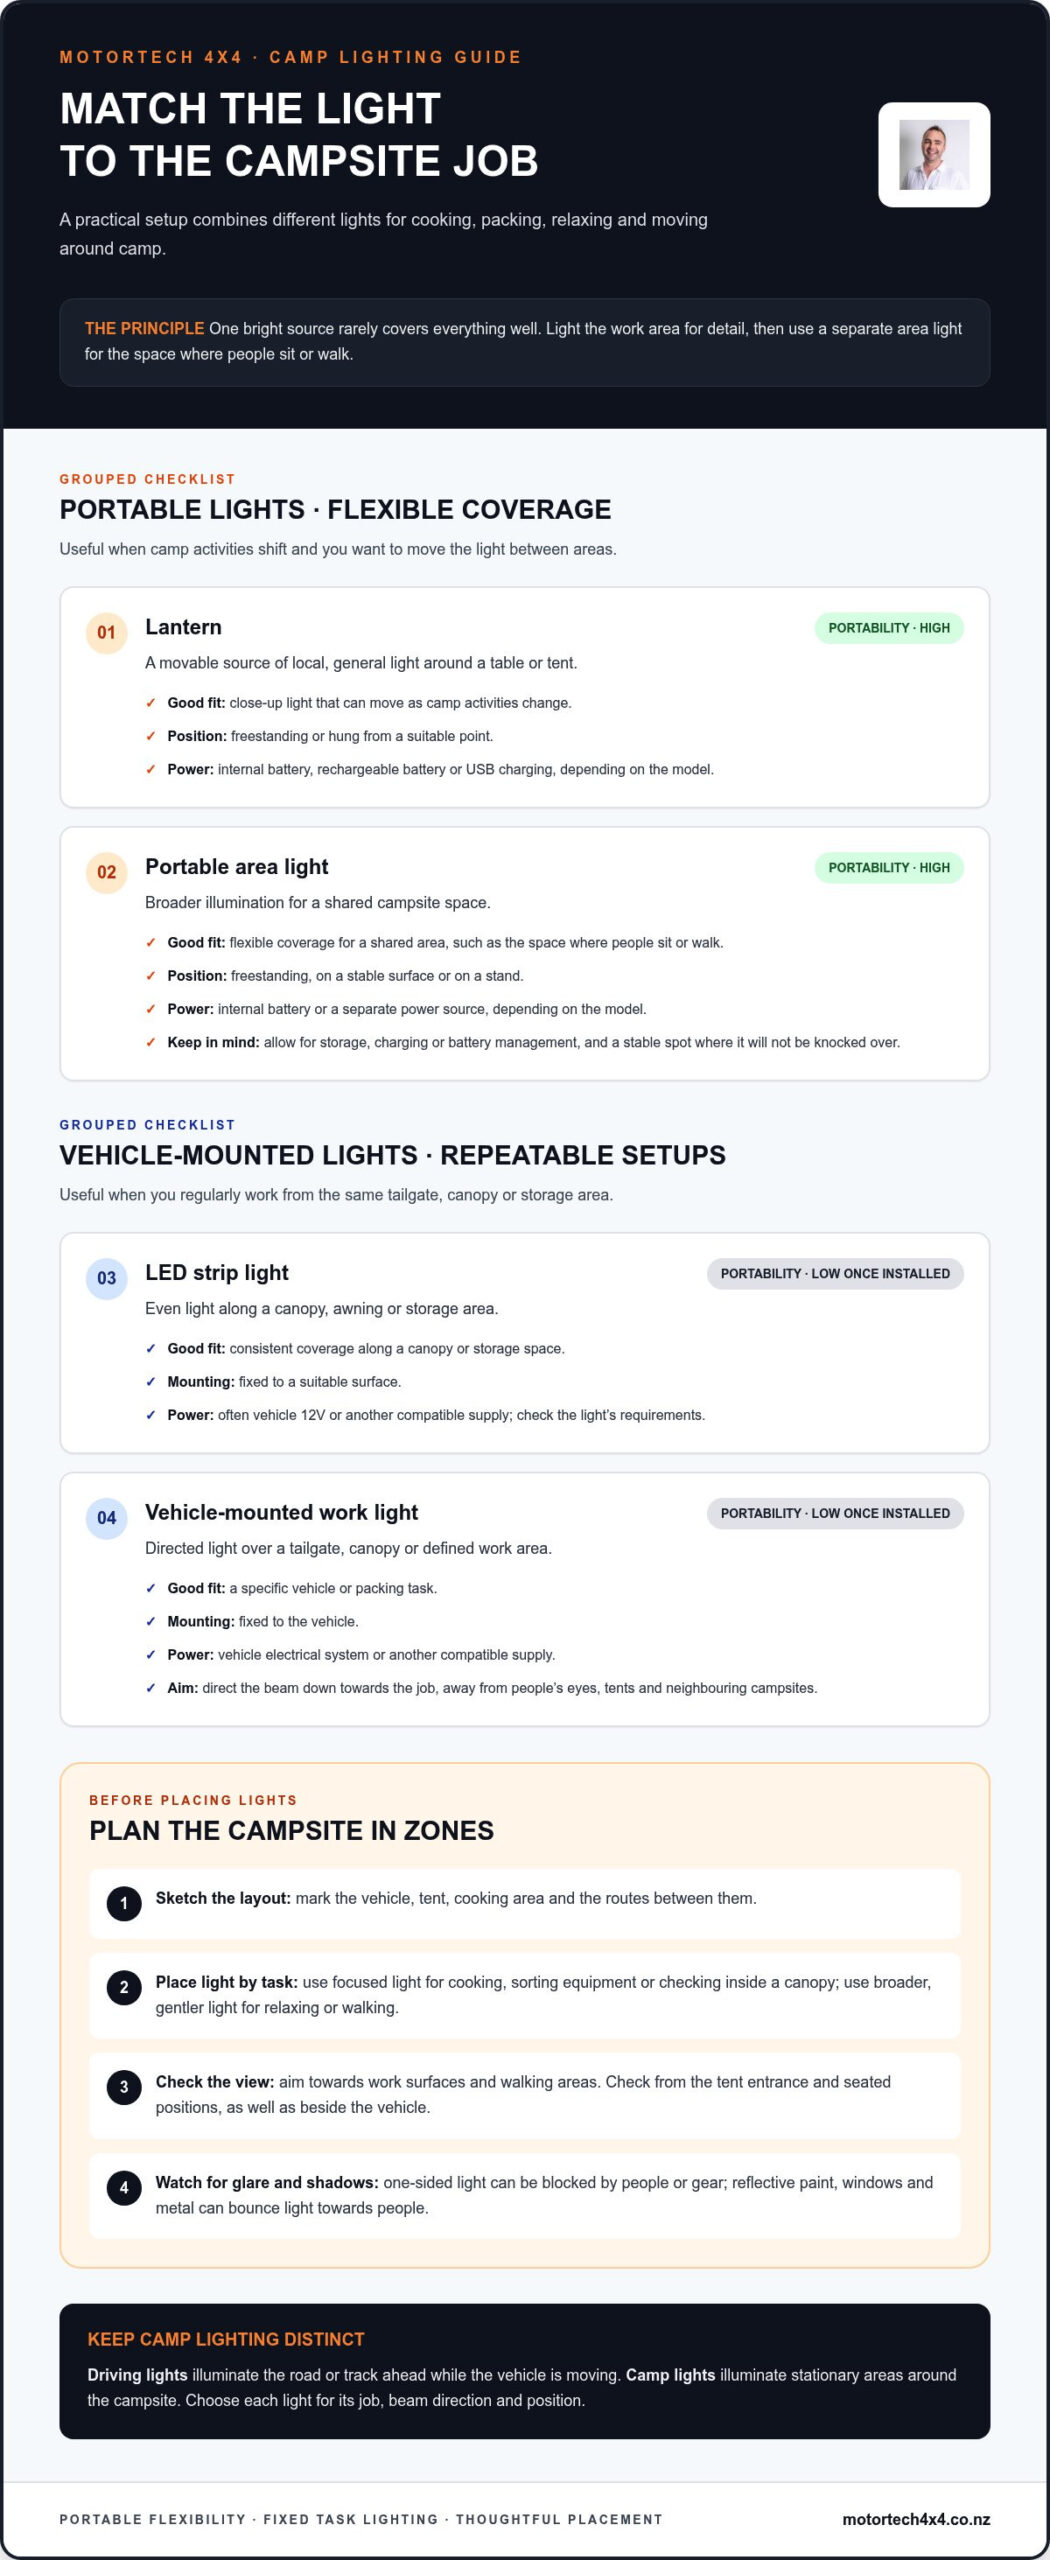
One bright source rarely covers everything well. If it’s mounted on one side of the vehicle, people and gear can block the beam and leave dark patches elsewhere. Think in zones: light the bench or cooking spot for detail, then use a separate area light for the space where people sit or walk.
Camp lights versus driving and work lights
Driving lights are designed to illuminate the road or track ahead while the vehicle is moving. Camp lights serve a different purpose, illuminating stationary areas around your campsite. The overview of automotive lighting systems explains the broader role of vehicle lighting, but campsite comfort depends on choosing the right beam direction and position.
A work light can help with a vehicle or packing task, but its concentrated beam may feel too harsh for relaxing or lighting a whole campsite. Aim task lighting down towards the job and away from people’s eyes. For general camp use, choose a position and spread of light that makes the area practical without unnecessary glare.
Types of 4×4 camp lighting: choose the right light for each job
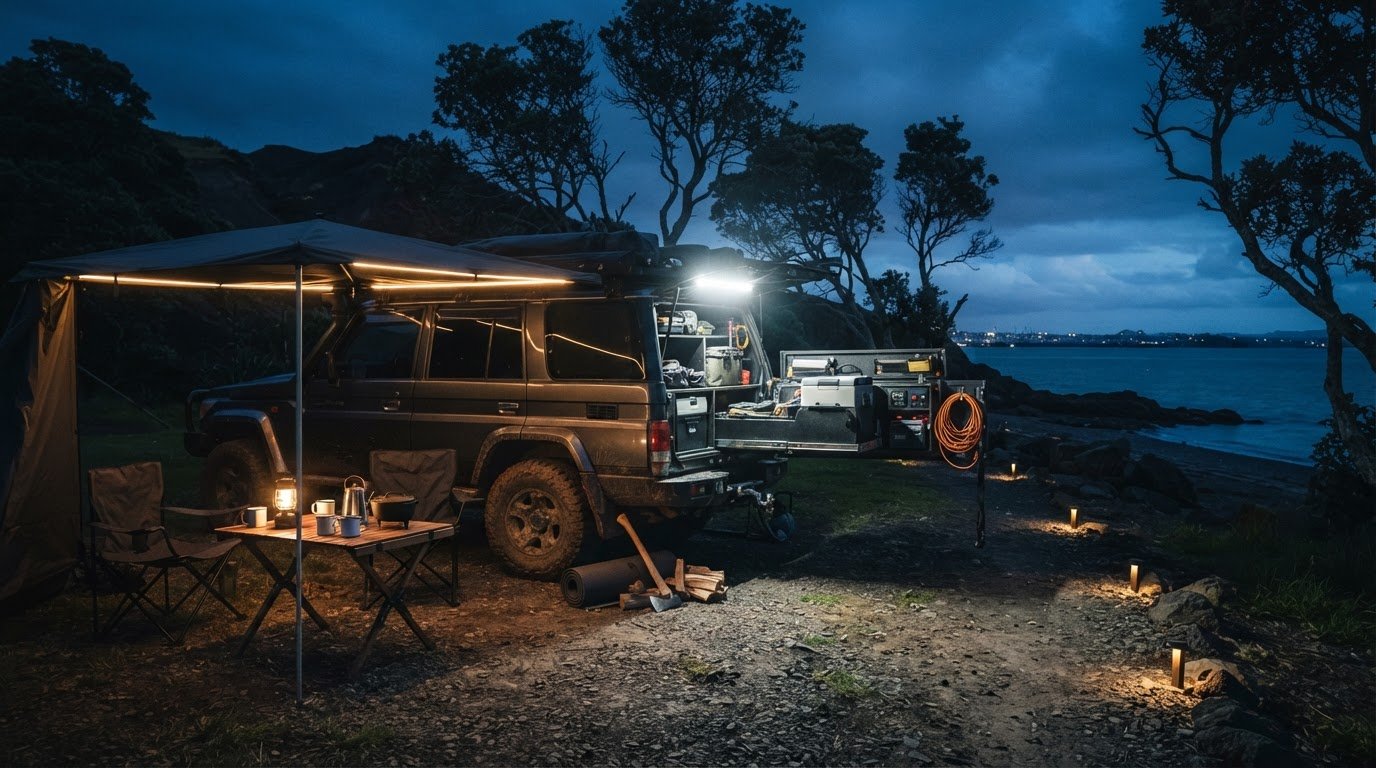
A practical setup combines lights with different purposes rather than relying on one lamp to cover the whole campsite. A lantern or portable area light can move as camp activities change; a strip light or vehicle-mounted work light can make a regular cooking or packing spot quicker to set up. Compare coverage and mounting options alongside power needs, so each light suits both the task and your vehicle layout.
| Light type | Typical coverage | Portability | Mounting | Likely power requirements |
|---|---|---|---|---|
| Lantern | Local, general light around a table or tent | High | Freestanding or hung from a suitable point | Internal battery, rechargeable battery or USB charging, depending on model |
| Portable area light | Broader illumination for a shared campsite space | High | Freestanding, stood on a stable surface or placed on a stand | Internal battery or a separate power source, depending on model |
| LED strip light | Even light along a canopy, awning or storage area | Low once installed | Fixed to a suitable surface | Often vehicle 12V or another compatible supply; check the light’s requirements |
| Vehicle-mounted work light | Directed light over a tailgate, canopy or work area | Low once installed | Fixed to the vehicle | Vehicle electrical system or another compatible supply |
Portable lights for flexible campsite coverage
Lanterns provide close, local illumination, while portable area lights can cover a wider shared space. Both can move from the dinner table to the packing area or closer to the tent as needed. Consider the trade-offs: portable units need storage space, charging or battery management, and a stable position where they won’t be knocked over.
Best fit: choose a lantern for movable local light and a portable area light for flexible shared coverage.
Vehicle-mounted lights for repeatable camp setups
Mounted lighting is useful when you regularly work from the same tailgate, canopy or storage area. A strip can provide even illumination along a canopy, while a work light directs a stronger beam onto a specific task. Check the mounting position and beam direction before installation. Aim light at the work surface, not into a tent or neighbouring campsite.
Best fit: use a strip for consistent canopy coverage and a work light for a defined vehicle task. Motortech 4X4 supplies and installs vehicle lighting and camping gear, so vehicle lighting fitting can be planned as part of a broader camp setup.
How to plan camp-light placement, brightness and colour
Before setting up, sketch the campsite from above. Mark the vehicle, tent, cooking area and routes you’ll walk between them. Add possible light positions beside the tasks they need to serve. This makes it easier to see where one source can cover a shared area and where close-up work needs its own light.
Match brightness to the task, distance and area. A cooking surface needs clear, focused illumination; a larger space for relaxing needs broader, gentler light. More output isn’t automatically better. A light that’s too bright or poorly directed can cause glare, while a narrow beam may leave the surrounding area in shadow.
Position lights to reduce glare and shadows
Aim lights down towards work surfaces and walking areas where practical. Check the view from the tent entrance and seated positions, not just from beside the vehicle. Reflective paint, windows and metal surfaces can bounce light towards people, while a single elevated source may cast equipment shadows across a work area.
Use this quick placement check when you arrive:
- Can you see the cooking surface and reach the gear you need?
- Are walkways lit without directing light into people’s eyes?
- Is the tent entrance comfortable, without a beam shining straight inside?
- Could light spill into a neighbouring campsite?
- Do bags, open doors or other equipment create dark patches?
Choose a useful colour and level of brightness
For detailed tasks, a neutral-looking light can make it easier to see what you’re handling. A softer, warmer-looking light may feel more comfortable for relaxing. There’s no single colour preference for every camper, so choose according to the activity and how the light feels in your setup. If a light has adjustable brightness, use a lower setting for general camp use and increase it when a task calls for more detail.
Test the arrangement before settling in. Switch on each light separately, then together, and look for gaps, glare and overlap. Adjust the direction or position before adding more output. A considered 4×4 camp lighting plan can make the cooking area functional while keeping the tent and shared space more relaxed.
Powering 4×4 camp lighting without guesswork
Estimate your lighting load before a trip rather than guessing at battery run time. Start with each light’s stated wattage and the hours you expect to use it. This gives an energy estimate in watt-hours (Wh), but not a guaranteed run time: the power source, device settings and conditions of use all matter.
- 1. List the lights you expect to use, including portable lamps and fixed lights.
- 2. Record the wattage shown in each light’s manufacturer specifications.
- 3. Estimate use time for each light over an evening or the full trip.
- 4. Multiply watts by hours for each light, then add the results to estimate total energy use.
Estimate how much energy your lighting will use
Here’s a hypothetical example, not a product performance claim. A strip light rated at 18W running for 3 hours uses an estimated 54Wh: 18W × 3 hours = 54Wh. A 6W lantern used for 4 hours adds 24Wh. A 24W work light running for 1 hour adds another 24Wh. The estimated total is 102Wh.
Include lights that run at the same time in your combined load, and count their full use periods in the estimate. Dimming or switching a light off between tasks can reduce consumption; longer evenings or several nights between charges can increase it. Treat the calculation as a planning guide and allow for real use rather than assuming every device runs exactly as estimated.
Plan charging, wiring and weather exposure
A starter battery is primarily there to start the vehicle, while a separately configured auxiliary system can provide another power source for accessories. Some setups may instead use a portable power station. Charging options depend on the vehicle’s power system, so plan around the equipment you have rather than assuming every 4×4 includes an auxiliary battery.
Check the manufacturer’s specifications for power draw and operating conditions. Actual run time can differ with settings, temperature, charging state and how the lights are used. For fixed lighting, suitable wiring, secure mounting and protection from water and dust are important for a dependable installation. Follow product instructions and use qualified installation support where needed. Motortech 4X4 supplies and installs vehicle lighting and camping gear; plan your vehicle lighting setup as part of your broader touring fit-out.
Build a complete 4×4 camp lighting setup with Motortech 4X4
A practical lighting setup starts with a plan, not a shopping list. Match each light to a campsite task, then consider where it will sit, how it will be powered and how it fits with the rest of your vehicle. This helps avoid buying lights that duplicate each other while leaving a useful area in shadow.
Prepare a lighting plan before buying or fitting
List the jobs you usually do after dark, such as cooking, finding equipment, packing or relaxing. Note where each activity happens around your vehicle and tent, then mark possible positions for task and area lighting.
Before choosing equipment, take stock of the existing setup:
- Power: Note the available power source and any existing charging or auxiliary equipment.
- Mounting: Identify suitable locations on the vehicle, canopy or awning, and consider where each beam will point.
- Storage: Allow space for portable lights and their charging equipment, if applicable.
- Use together: Check that the lights, power arrangements and vehicle layout work as one setup.
Choose light types for the tasks, map their positions and estimate the power required for the hours you expect to use them. Include portable and fixed lighting when they serve different purposes. A flexible lantern, for example, can complement fixed illumination at a regular work area rather than duplicate it.
Get local support for a vehicle-integrated setup
Planning vehicle lighting and camping gear together lets you consider placement, power needs and storage as part of the broader fit-out. A light mounted for canopy access, for instance, should suit how you open and use that space, not just where it can be attached. Professional fitment can integrate vehicle lighting into the overall arrangement.
Motortech 4X4 is an Auckland-based specialist retailer and service centre that supplies and installs vehicle lighting and camping gear. Bring your task list, vehicle layout and power notes to help shape a setup around how you tour.
Ready to plan a practical fit-out? Explore vehicle lighting and camping gear and discuss a suitable setup with Motortech 4X4.
Plan your lighting for the trips ahead
A dependable setup starts with the jobs you need to do at camp. Choose lights for cooking, packing and shared spaces, then position them to reduce glare and dark patches. Keep campsite illumination distinct from driving lights, and estimate power use from each light’s wattage and expected hours of operation.
This task-first approach makes 4×4 camp lighting more practical: every light has a purpose, and the setup works with your vehicle layout and available power. Consider lighting alongside your camping gear and broader fit-out rather than treating each choice in isolation.
Motortech 4X4 is an Auckland-based specialist retailer and service centre that supplies and installs vehicle lighting and camping gear. Explore vehicle lighting and camping gear to plan a setup suited to your touring needs. With a clear plan, you can head away better prepared for useful, comfortable light around camp.
Frequently Asked Questions
How do I choose 4×4 camp lighting?
Choose 4×4 camp lighting by matching each light to a task, then planning its position and power supply. List what you need to do after dark, such as cooking, finding equipment or moving between the vehicle and tent. A focused light may suit a work surface, while broader coverage can illuminate a shared area. Consider glare and shadows as well as brightness so the setup works comfortably around camp.
What is the difference between camp lights and driving lights?
Camp lights illuminate areas around a parked vehicle, tent or cooking space; driving lights are designed to improve visibility while the vehicle is moving. They serve different purposes, so don’t assume a driving light will provide comfortable campsite illumination. For camp, prioritise useful coverage and controlled glare around people. Vehicle lighting for road use needs separate consideration of its function and applicable requirements in New Zealand.
How do I calculate how much power camp lights use?
Multiply each light’s wattage by the hours you expect to use it to estimate energy consumption in watt-hours (Wh). For example, a hypothetical 10W light used for 3 hours consumes an estimated 30Wh. Add the estimates for lights likely to run during the same period. This is a planning figure, not a guaranteed run time: dimming, intermittent use, battery condition and your wider power setup can affect actual consumption.
Can I run camp lights from my 4×4 battery?
You may be able to, depending on the lights, wiring and vehicle power setup, but first consider the battery’s role. A starter battery is intended to start the vehicle, so extended accessory use may affect its ability to do that. A separately configured auxiliary system or portable power station may suit some setups. Estimate lighting demand for the trip, follow equipment instructions and use appropriate installation support for vehicle-integrated wiring.
Are LED lights suitable for 4×4 camping?
LED lights can suit 4×4 camping, but the right option depends on the job and setup. Compare the stated output, beam pattern and power requirements with the area you want to illuminate and the power available. Consider whether you need a portable light or fixed fitting, where it will be mounted and whether its beam could cause glare. Check the manufacturer’s specifications before choosing.
Where should I mount lights for a 4×4 campsite?
Map the vehicle, tent, cooking area and walking routes, then position lights to suit each zone. Place task lighting near food preparation or gear access, and use broader coverage for shared spaces. Aim beams down towards work surfaces and paths, away from people’s eyes and tent entrances. Don’t rely on one source to illuminate everything, as equipment or open vehicle doors can create shadows. In Auckland, Motortech 4X4 supplies and installs vehicle lighting and camping gear.