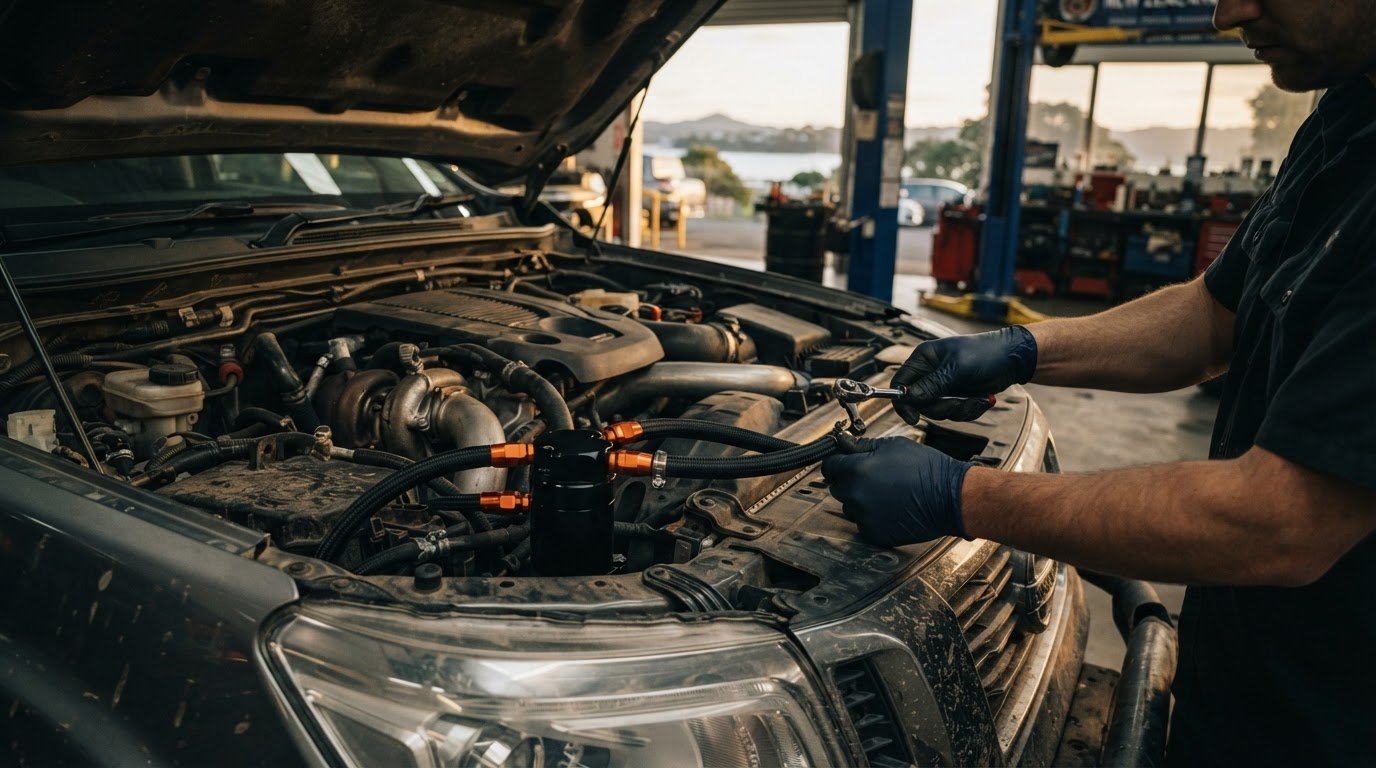
Could a catch can protect a diesel’s intake yet cause problems if its hoses are routed incorrectly? That’s why catch can installation diesel engine owners are considering needs careful planning: the setup must suit the vehicle’s crankcase ventilation layout, not just fit neatly under the bonnet.
Before choosing a kit or starting work, check how your engine’s ventilation system is arranged, whether the kit matches it, and whether you can mount and maintain the canister safely. This guide explains what a catch can does, what to verify for your specific engine, and the main installation steps, from choosing a mounting position to checking hose connections. It also covers routine inspection and draining, so maintenance isn’t an afterthought.
In New Zealand, a catch can must remain a sealed system rather than vent crankcase gases directly to the atmosphere. Vehicle layout, emissions equipment and access can all affect fitment. If routing or setup is uncertain, experienced mechanical guidance can help you plan carefully. Motortech 4X4’s Auckland workshop provides 4×4 servicing and mechanical work for all makes and models.
Key Takeaways
- Understand how a catch can separates oil mist from crankcase gases, and what it can and can’t be expected to do.
- Check connection points, hose sizing, mounting position and orientation against your engine layout and the kit instructions before starting.
- Compare DIY and workshop fitment with your tools, experience and the access available around the engine.
- Follow the vehicle and kit instructions for preparation, mounting, hose routing, drain setup and post-fitment checks.
- Plan maintenance around the kit and vehicle guidance. Seek qualified assessment if you notice leaks, damage or changes in engine behaviour.
What does a catch can do on a diesel engine, and when is one considered?
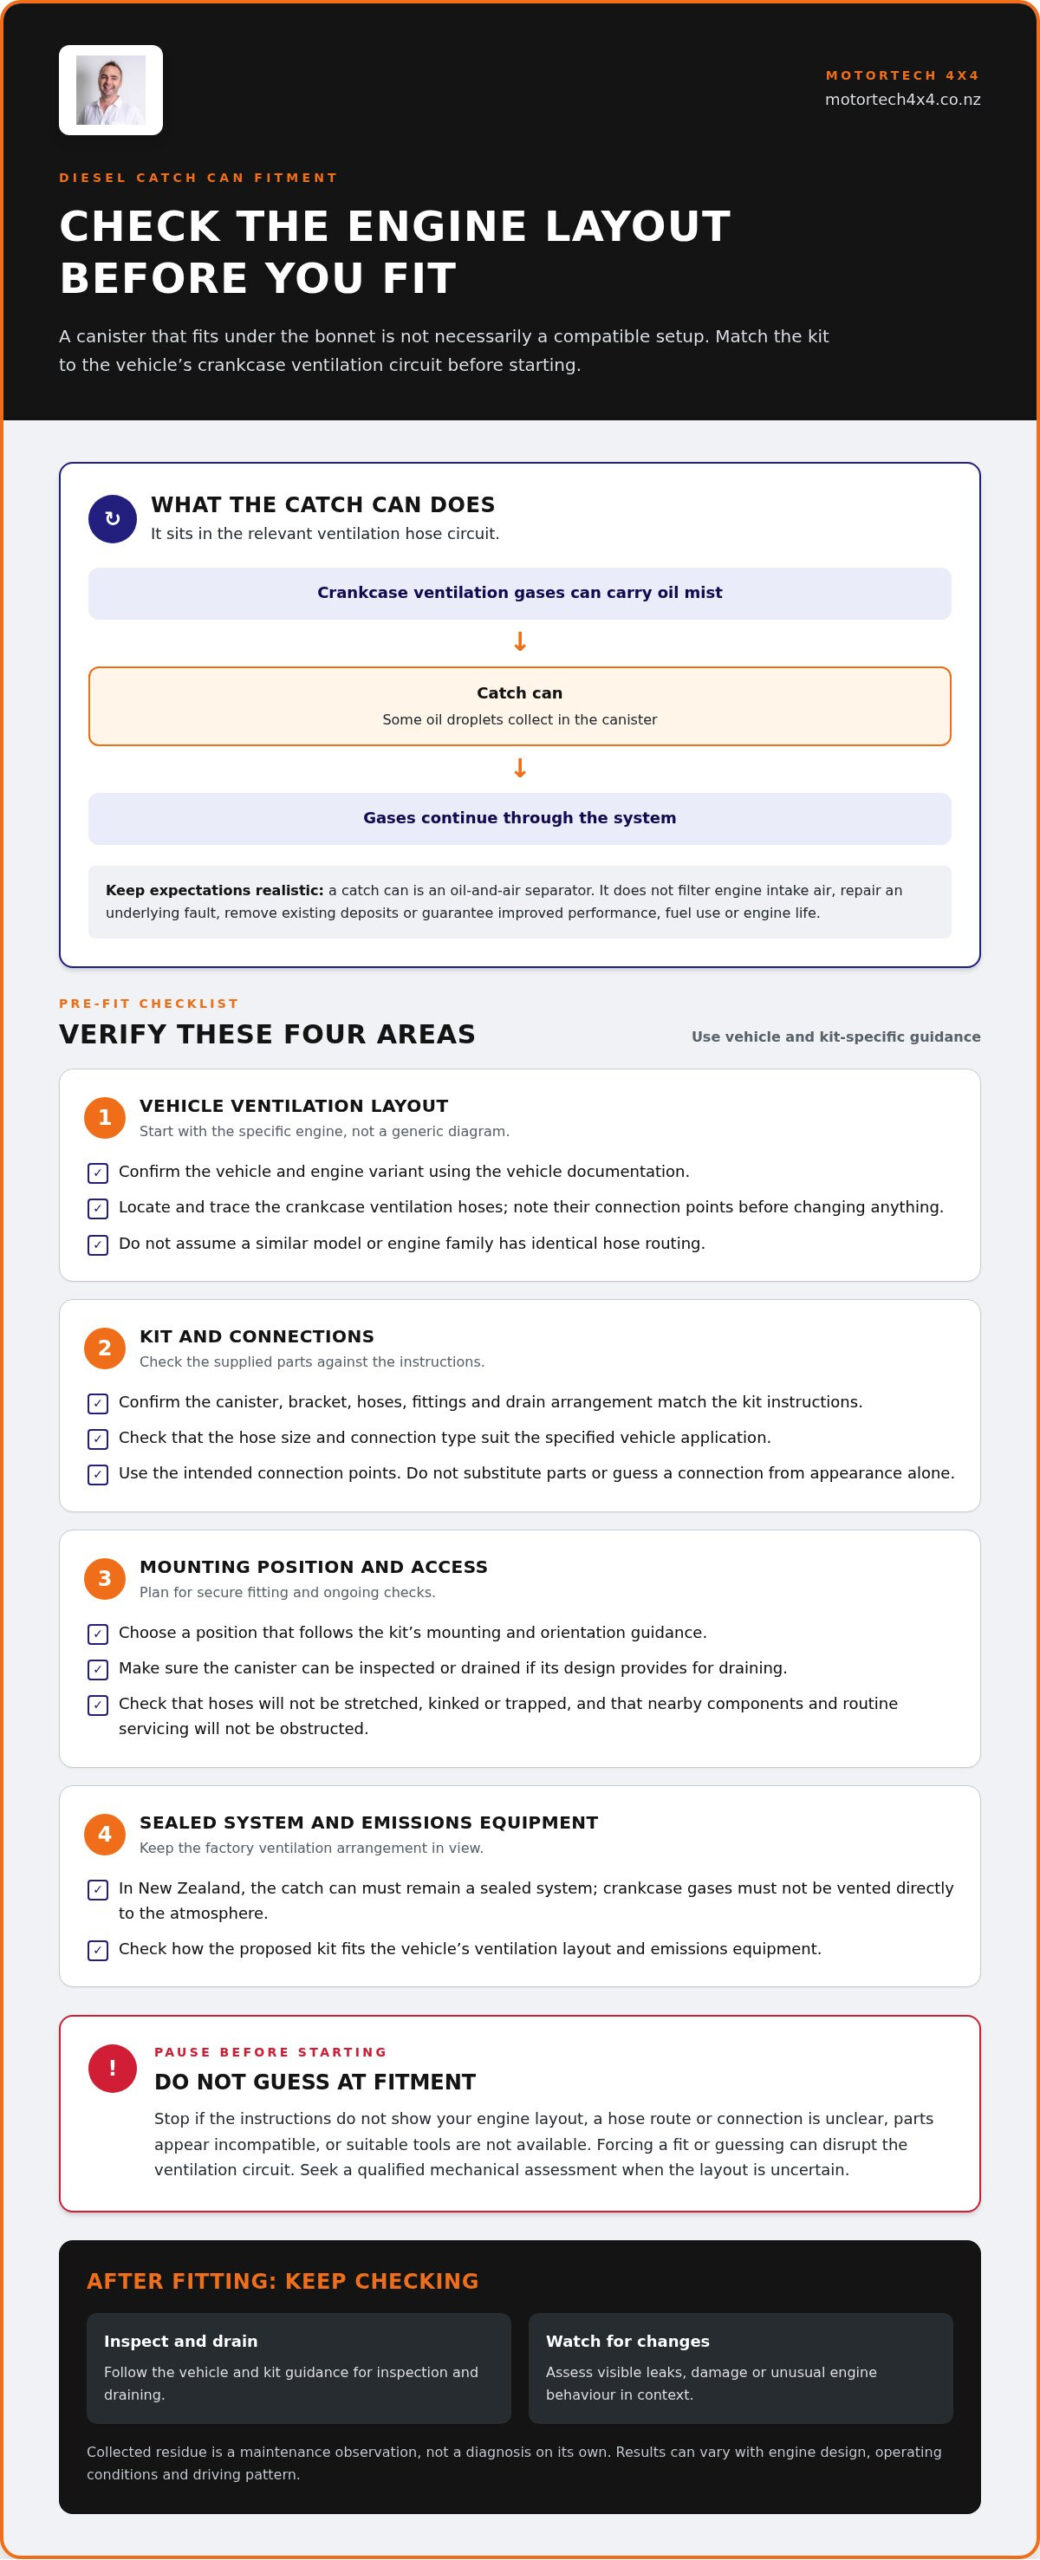
A diesel catch can is a vessel fitted into a vehicle’s crankcase ventilation circuit to collect some oil mist carried in ventilation gases before those gases are routed onwards. It’s an oil-and-air separator, not a filter for engine intake air or a device that repairs an underlying mechanical fault. Its position and connections depend on the engine’s ventilation design.
That distinction helps set realistic expectations. An owner may consider a catch can to manage oil residue in the ventilation pathway, but whether one is appropriate depends on the particular vehicle and its factory system.
How a diesel catch can fits into crankcase ventilation
During combustion, a small amount of gas can pass the piston rings into the crankcase. These gases, commonly called blow-by, can carry fine droplets of engine oil, known as oil mist. Crankcase ventilation manages these gases rather than allowing pressure to build in the engine. Depending on the vehicle, the gases may be directed back towards the intake through a hose circuit.
When fitted, a catch can sits in the relevant ventilation hose circuit. Some oil droplets separate out and collect in the can while the gases continue through the system. The arrangement isn’t identical across diesel engines: hose routing, valves and connection points vary. This Oil catch can reference outlines the general principle, but it doesn’t replace the vehicle’s service information or kit-specific fitment instructions.
That variation matters when planning catch can installation diesel engine work. A generic diagram can explain the principle, but it can’t confirm which hose or port applies to a particular model. Use the vehicle’s original ventilation layout as your reference.
What a catch can can and cannot tell you
Residue in the can shows that material has gathered over a period of use. It can be a useful maintenance observation, especially if you record the inspection date and how the vehicle is used. However, the amount or appearance of residue alone doesn’t diagnose engine wear, a fault or the condition of the intake. Results can vary with engine design, operating conditions and driving pattern.
Fitting a catch can doesn’t guarantee that intake deposits will be prevented or that performance, fuel use or engine life will improve. It intercepts some oil mist, but it doesn’t remove existing deposits or address every source of contamination. A sudden change in collected residue, visible leaks or unusual engine behaviour should be assessed in context rather than judged from the can alone.
Owners may consider a catch can as part of a broader approach to managing crankcase ventilation. Before deciding, establish how the specific diesel routes its gases and whether the proposed kit is designed for that layout. Vehicle-specific planning is central to sound mechanical work, including routine 4×4 servicing.
Check engine compatibility and catch can components before installation
Compatibility is about more than whether a canister fits under the bonnet. The engine’s crankcase ventilation layout determines which hoses are involved, while the kit instructions specify the intended connections and mounting arrangement. Before starting catch can installation diesel engine work, identify the vehicle and engine accurately, then compare the supplied parts and instructions with the engine bay.
What to check on the vehicle first
Use the vehicle documentation to confirm the engine variant and locate the crankcase ventilation hoses. Don’t assume that a similar model or engine family has identical routing: factory layouts can differ. Trace the relevant hose path and note its connection points before removing or changing anything.
Next, assess possible mounting positions against the kit instructions. The canister needs to be secure, correctly oriented and accessible for inspection or draining. Check that the hose paths won’t be stretched, kinked or trapped, and that the installation won’t obstruct nearby components or routine servicing. Clearance and orientation requirements are vehicle- and kit-specific, so follow the manufacturer’s guidance rather than relying on a universal diagram.
What a catch can kit and installation plan need to account for
A kit may include a canister, mounting bracket, hoses, fittings and a drain arrangement. Each part has a purpose: the bracket supports the can, fittings join the intended hose connections, and the drain allows collected residue to be removed if the design provides for it. Check that the supplied components match the kit instructions, and that the proposed hose size and connection type suit the specified vehicle application. Don’t substitute parts or infer a connection from appearance alone.
For a vehicle used in New Zealand, keep the factory ventilation and emissions equipment in view when assessing the proposed setup. The kit instructions should explain how its components fit the relevant vehicle layout. If they don’t show your engine or leave a connection unclear, a generic diagram isn’t a substitute for vehicle-specific guidance.
Pause before starting if the instructions don’t show your engine layout, the hose routing is uncertain, parts appear incompatible or you don’t have suitable tools. Forcing a fit or guessing at a connection can disrupt the ventilation circuit. A qualified mechanical assessment is a sensible next step when the layout is unclear. Vehicle-specific planning is also central to Motortech 4X4’s Auckland mechanical services.
Pre-installation checklist:
- Confirm the vehicle and engine variant from its documentation.
- Identify the existing ventilation hoses and trace their connections.
- Compare the kit instructions and supplied parts with the engine layout.
- Check mounting security, orientation, service access and hose clearance.
- Stop if routing, parts or required tools remain uncertain.
DIY or workshop fitment: compare the installation trade-offs
Choosing between DIY and workshop support depends on more than confidence with hand tools. Engine access, the route of the crankcase ventilation hoses and the quality of the kit’s vehicle-specific instructions all affect the work. A straightforward layout with clear guidance may suit a capable owner. Restricted access or uncertain connections can make mechanical support the more considered option.
Use this comparison to assess the work before you begin. It’s a planning aid, not a substitute for the vehicle or kit manufacturer’s instructions.
| Consideration | DIY fitment | Workshop support |
|---|---|---|
| Skill | Requires confidence identifying the correct ventilation hoses and following the kit’s fitment guidance. | Mechanical experience can help assess access, hose routing and how the proposed setup relates to the vehicle. |
| Tools and access | You’ll need suitable tools and enough working space to mount the can and route hoses without interference. | A workshop setting can be useful where access is restricted or surrounding components complicate the job. |
| Instructions | Best suited to a kit with clear guidance that matches the vehicle and engine layout. | Mechanical support is worth considering if instructions don’t explain the relevant connections or mounting requirements. |
| Inspection | You’re responsible for checking your work against the instructions and looking for loose connections or leaks. | Workshop assistance can provide a practical setting for assessing the installation and related mechanical concerns. |
When a capable owner may handle the work
DIY may be a reasonable option if you’re comfortable working in the engine bay, have the required tools and can match the instructions to your exact vehicle. Follow the kit guidance, not a photo or hose layout from another model, even if it looks similar. Stop if the routing is unclear or the job appears to need modifications you don’t understand. Don’t guess at a connection.
Be realistic about access, too. A mounting position that looks workable before fitting may leave hoses strained, obstruct inspection or make routine access difficult. If you can’t establish a clear, secure arrangement from the instructions, pause rather than forcing the fit.
When Auckland workshop support is a practical option
Restricted engine-bay access, unfamiliar ventilation routing or uncertainty about how a proposed setup relates to the vehicle are sound reasons to seek mechanical guidance. Motortech 4X4 provides 4×4 Servicing & Mechanical from its Glenfield workshop and services all makes and models. Its mechanical services are relevant when owners need help with broader vehicle-specific mechanical questions, as each catch can kit and fitment is different.
For a wider view of vehicle preparation and mechanical work, Auckland 4×4 Guide: Expert Modifications, Servicing, and Off-Road Gear provides related context. Whether you’re weighing up catch can installation diesel engine work at home or considering mechanical support, base the decision on the actual engine layout, available access and instructions in front of you.
How to install a diesel catch can: a careful step-by-step process
In general, fitting a diesel catch can means preparing the vehicle, mounting the canister as specified, connecting the correct ventilation hoses, setting up any supplied drain and checking the finished work. The exact connections and sequence vary, so the vehicle and kit instructions take precedence over this overview. Don’t use a generic guide to decide which hose connects to which port.
For catch can installation diesel engine work, treat each stage as a hold point. If the instructions don’t match the engine layout, stop and resolve the uncertainty before proceeding.
Prepare and mount the catch can
- Review the instructions. Confirm the kit is intended for the vehicle and engine, and study its routing diagram and preparation requirements. Set up the work area and prepare the vehicle as directed by the manufacturer. Don’t begin if the specified procedure or connection points are unclear.
- Plan the position. Identify the instructed mounting location and check that the canister and bracket will have the stated clearance. Consider future inspection and draining, and whether the hose paths can reach without being strained, kinked or trapped.
- Secure the assembly. Fit the supplied bracket and canister using the kit’s stated hardware and method. Don’t improvise fasteners or choose a mounting point simply because it’s convenient. Before moving on, check that the assembly is secure and positioned as instructed.
Route the hoses and inspect the completed fitment
- Trace the specified connections. Use the vehicle-specific diagram to identify the ventilation connections and the kit’s designated ports. Hose routing and inlet or outlet arrangements aren’t universal. Fit the supplied hoses and fittings as directed, making sure they follow the intended path and don’t interfere with surrounding components.
- Set up the drain. If the kit includes a drain component, install and position it according to the manufacturer’s instructions. Keep the arrangement accessible for the maintenance procedure specified for that kit. Don’t omit, alter or reposition parts based on an assumed shortcut.
- Inspect before operation. Compare the completed fitment with both sets of instructions. Check the bracket, hose connections, routing, clearance and drain arrangement. Look for loose fittings, pinched hoses or contact with nearby components. If anything differs from the specified setup, correct it before operating the vehicle. Follow the kit’s instructions for any further checks after start-up.
This sequence is a framework, not a universal fitment recipe. Vehicle-specific instructions determine the preparation, mounting hardware, connection layout and inspection requirements. If the route remains uncertain or the work calls for unfamiliar modifications, pause and seek qualified mechanical assessment rather than guessing.
For broader vehicle-specific mechanical needs, explore Motortech 4X4’s Auckland mechanical services, including 4×4 servicing and mechanical work.
After installation: inspect, maintain, and decide on the next step
A catch can needs ongoing attention after fitment. The kit and vehicle instructions determine how and when to inspect, drain, clean or replace components. There’s no universal emptying interval: collected volume can vary with the engine, catch can design and operating conditions. Follow the specified maintenance guidance rather than setting a schedule based on another vehicle.
How to inspect and maintain a fitted catch can
Use the manufacturer’s procedure for each inspection and maintenance task, including any instructions about safe access and handling collected contents. Check the canister, bracket, hoses, fittings and drain arrangement for visible damage, movement or signs of leakage. Look for hoses that appear loose, pinched or out of position. A visual check can reveal obvious issues, but it can’t confirm the condition of the whole engine or guarantee that a fault won’t develop.
When draining or cleaning is due, follow the kit instructions and refit any removed components as specified. Don’t leave a drain open or change the hose arrangement as a shortcut. If a part is damaged, a connection won’t secure properly or you’re unsure how to complete the maintenance procedure, pause and seek qualified mechanical advice.
Keep a simple record after fitment and at each maintenance check. Note the date, what you observed, whether residue was collected and what work you completed. Record changes in the amount or appearance as well. These notes provide useful context over time, but residue is an observation, not a diagnosis by itself. Interpret it alongside the vehicle’s symptoms, service history and relevant mechanical checks.
Next steps for diesel 4WD owners in Auckland
After catch can installation, diesel engine owners should continue to monitor the fitment as directed, especially if the setup has been altered or a connection has needed attention. Pause DIY work if you can’t identify the correct routing, the kit instructions don’t match the installed arrangement, or you find leaks, damage or loose connections. Changes in engine behaviour, unfamiliar noises or other symptoms also warrant qualified assessment rather than relying on the catch can contents to explain the cause.
Motortech 4X4’s Glenfield workshop in Auckland provides 4×4 Servicing & Mechanical and servicing for all makes and models. For uncertain fitment or broader mechanical concerns, an assessment can put catch can observations in the context of the vehicle’s overall condition.
Explore Motortech 4X4 mechanical services
Make your next diesel maintenance decision with confidence
A catch can is one part of a broader maintenance picture, not a substitute for assessing the engine and its ventilation system as a whole. Keep fitment and maintenance records with your vehicle’s service history, and treat changes in residue, leaks or engine behaviour as reasons to review the setup rather than guess at a cause.
If the routing remains uncertain, the installation doesn’t match the kit guidance or you’ve noticed a mechanical concern, pause before making further changes. Careful assessment keeps decisions grounded in the vehicle’s actual condition. For catch can installation diesel engine questions alongside wider 4WD mechanical needs, Motortech 4X4’s Auckland workshop provides 4×4 Servicing & Mechanical support. The workshop uses genuine and high-quality OEM car parts and consumables in its mechanical work.
To discuss your vehicle’s broader mechanical needs, explore Motortech 4X4 mechanical services.
Catch can installation diesel engine: practical considerations
Before you choose a kit, confirm that its fitment instructions match your engine and that you can maintain the installed setup as directed. If either point is unclear, get mechanical guidance before making changes to the ventilation circuit. Auckland 4WD owners can also use Motortech 4X4’s Glenfield workshop for 4×4 servicing and mechanical support.
Frequently Asked Questions
Is a catch can necessary on every diesel engine?
No, a catch can isn’t necessary for every diesel. Whether it’s suitable depends on the engine’s existing crankcase ventilation design, factory equipment and the vehicle manufacturer’s guidance. Before considering an addition, check whether it’s compatible with the original emissions and ventilation systems. A catch can shouldn’t be treated as a routine fix for smoke, oil consumption or warning lights. Those symptoms need proper diagnosis.
Can I install a catch can on a diesel engine myself?
Yes, if you’re confident working around engine-bay components and can follow instructions written for your specific vehicle. Catch can installation diesel engine owners take on themselves still requires careful identification of the correct hoses and connections. Have the specified tools ready, and don’t proceed if the instructions call for unfamiliar changes or the actual layout differs from the diagram. If unsure, get qualified mechanical help.
How do I know which catch can fits my diesel vehicle?
Match the kit to the vehicle’s make, model, year and engine variant, then verify the application against the kit maker’s fitment information. A model name alone may not identify the correct engine or ventilation arrangement. Check that the instructions show the same connection layout as your vehicle and account for its existing equipment. If the application or diagram is ambiguous, resolve that before buying or modifying hoses.
Where should a catch can be mounted in a diesel engine bay?
Use the mounting location and orientation specified for the kit and vehicle, rather than copying a position from another engine bay. The chosen spot should allow the canister to be secured and accessed for maintenance, while keeping hoses clear of moving or hot components. Confirm bonnet clearance and make sure the position doesn’t obstruct routine checks or access to other service items.
How often should I empty or service a diesel catch can?
Follow the maintenance interval and procedure specified by the catch can manufacturer and vehicle guidance. There isn’t one schedule that suits every engine or driving pattern. At each service check, note the date and the amount collected, then compare observations over time. If the can fills sooner than expected or the collected material changes noticeably, don’t assume the cause. Have the vehicle assessed in context.
What should I check after installing a diesel catch can?
Check that the canister and bracket remain secure, the hoses are seated as instructed, and nothing is rubbing, pinched or leaking. Confirm that service access hasn’t been restricted and that any drain is positioned as the kit specifies. Recheck after maintenance or if you notice a change in engine behaviour. A leak, damaged hose or loose connection warrants prompt attention. Don’t rely on collected residue alone to identify a fault.