A bullbar installation doesn’t have one fixed price. How much a bullbar installation costs depends on your vehicle, the bar’s fitment requirements and any additional work. Compatibility, mounting points, wiring and sensor integration can all affect the job, so the cost is determined by the vehicle and installation scope.
When weighing the cost, consider the protection you want and the risks of fitting a heavy accessory incorrectly. This guide explains the main cost factors, compares professional fitting with DIY, and covers the vehicle-specific checks to make before installation.
In New Zealand, a bullbar must not adversely affect frontal impact protection features such as airbags or crumple zones, and sharp edges are prohibited. You’ll also learn why vehicle compatibility and mounting design matter, when additional wiring or fabrication may be needed, and how to assess whether the investment suits your vehicle and use.
Key Takeaways
- Match the bullbar to your exact vehicle model before purchase; mounting points and extra bracket or drilling requirements can affect the fitting work.
- Check the bar’s shape and fit: New Zealand restrictions prohibit sharp edges, welding it to the chassis or body, and an unnecessarily wide gap from the vehicle.
- Installation must not adversely affect frontal impact protection features, including airbags and crumple zones.
- Allow for differences in handling the bar: steel bullbars take more time and effort to install than lightweight plastic or aluminium options.
- Professional fitting can help reduce the risk of vehicle damage from an inexperienced installation, particularly when mounting and vehicle systems need careful attention.
Fitting a bull bar to specific vehicle models
A bull bar must suit the vehicle’s make, model and configuration. Before purchase, compare the bar’s fitment details with the exact vehicle, rather than relying on its general class. A bar intended for one 4WD ute may not fit another ute’s bumper, chassis mounting points or front-end layout. Confirming compatibility first helps avoid extra installation work caused by a mismatch.
Mounting design is a key part of that comparison. Larger bull bars may require both upper and lower mounting brackets to secure the assembly to the vehicle. Some 4WD utes lack pre-drilled upper mounting holes, so fitting can require additional drilling. These differences affect the work involved, even when two vehicles look similar from the outside.
Vehicle class offers a useful starting point, not a fitment guarantee. A passenger vehicle, SUV and 4WD ute can have different front structures and mounting arrangements. Even within the 4WD ute class, model generations and factory equipment can change the fit. Treat the exact vehicle specification as the reference point, then match the bull bar and its brackets to it.
Modifying a bar to force a fit can create further problems. Changes may void the manufacturer’s warranty, and a poor match can leave an unsuitable gap between the bull bar and vehicle. New Zealand restrictions prohibit bull bars with an unnecessarily wide gap, sharp corners or edges, or aftermarket bars welded to the vehicle’s chassis or body. A correctly matched bar avoids relying on those alterations.
Check the front-end equipment as well as the mounting points. A suitable bull bar should have rounded edges, airbag compatibility and correctly positioned indicators. It must not adversely affect frontal impact protection features, including airbags or crumple zones. If indicators or other equipment are integrated into the original front bumper, the replacement arrangement needs to account for them.
Start by identifying the exact vehicle model and configuration, then compare its mounting requirements with the bull bar’s fitment information. Include any bracket changes, required drilling and equipment relocation in the fitting plan. This model-specific detail matters more than choosing a bar based only on appearance or vehicle class.
The fitting cost depends on vehicle compatibility, mounting brackets, drilling requirements and any work needed around front-end equipment. The cost is determined by the vehicle and chosen bull bar, as well as the work required.
That check is worth completing before committing to a purchase. Checking compatibility with the vehicle beforehand can help avoid higher installation costs later, rather than discovering a mismatch during fitting. Make compatibility part of the purchase decision: assess the vehicle and bull bar together before choosing a bar, so an unsuitable match does not lead to increased installation costs.
Professional installation costs
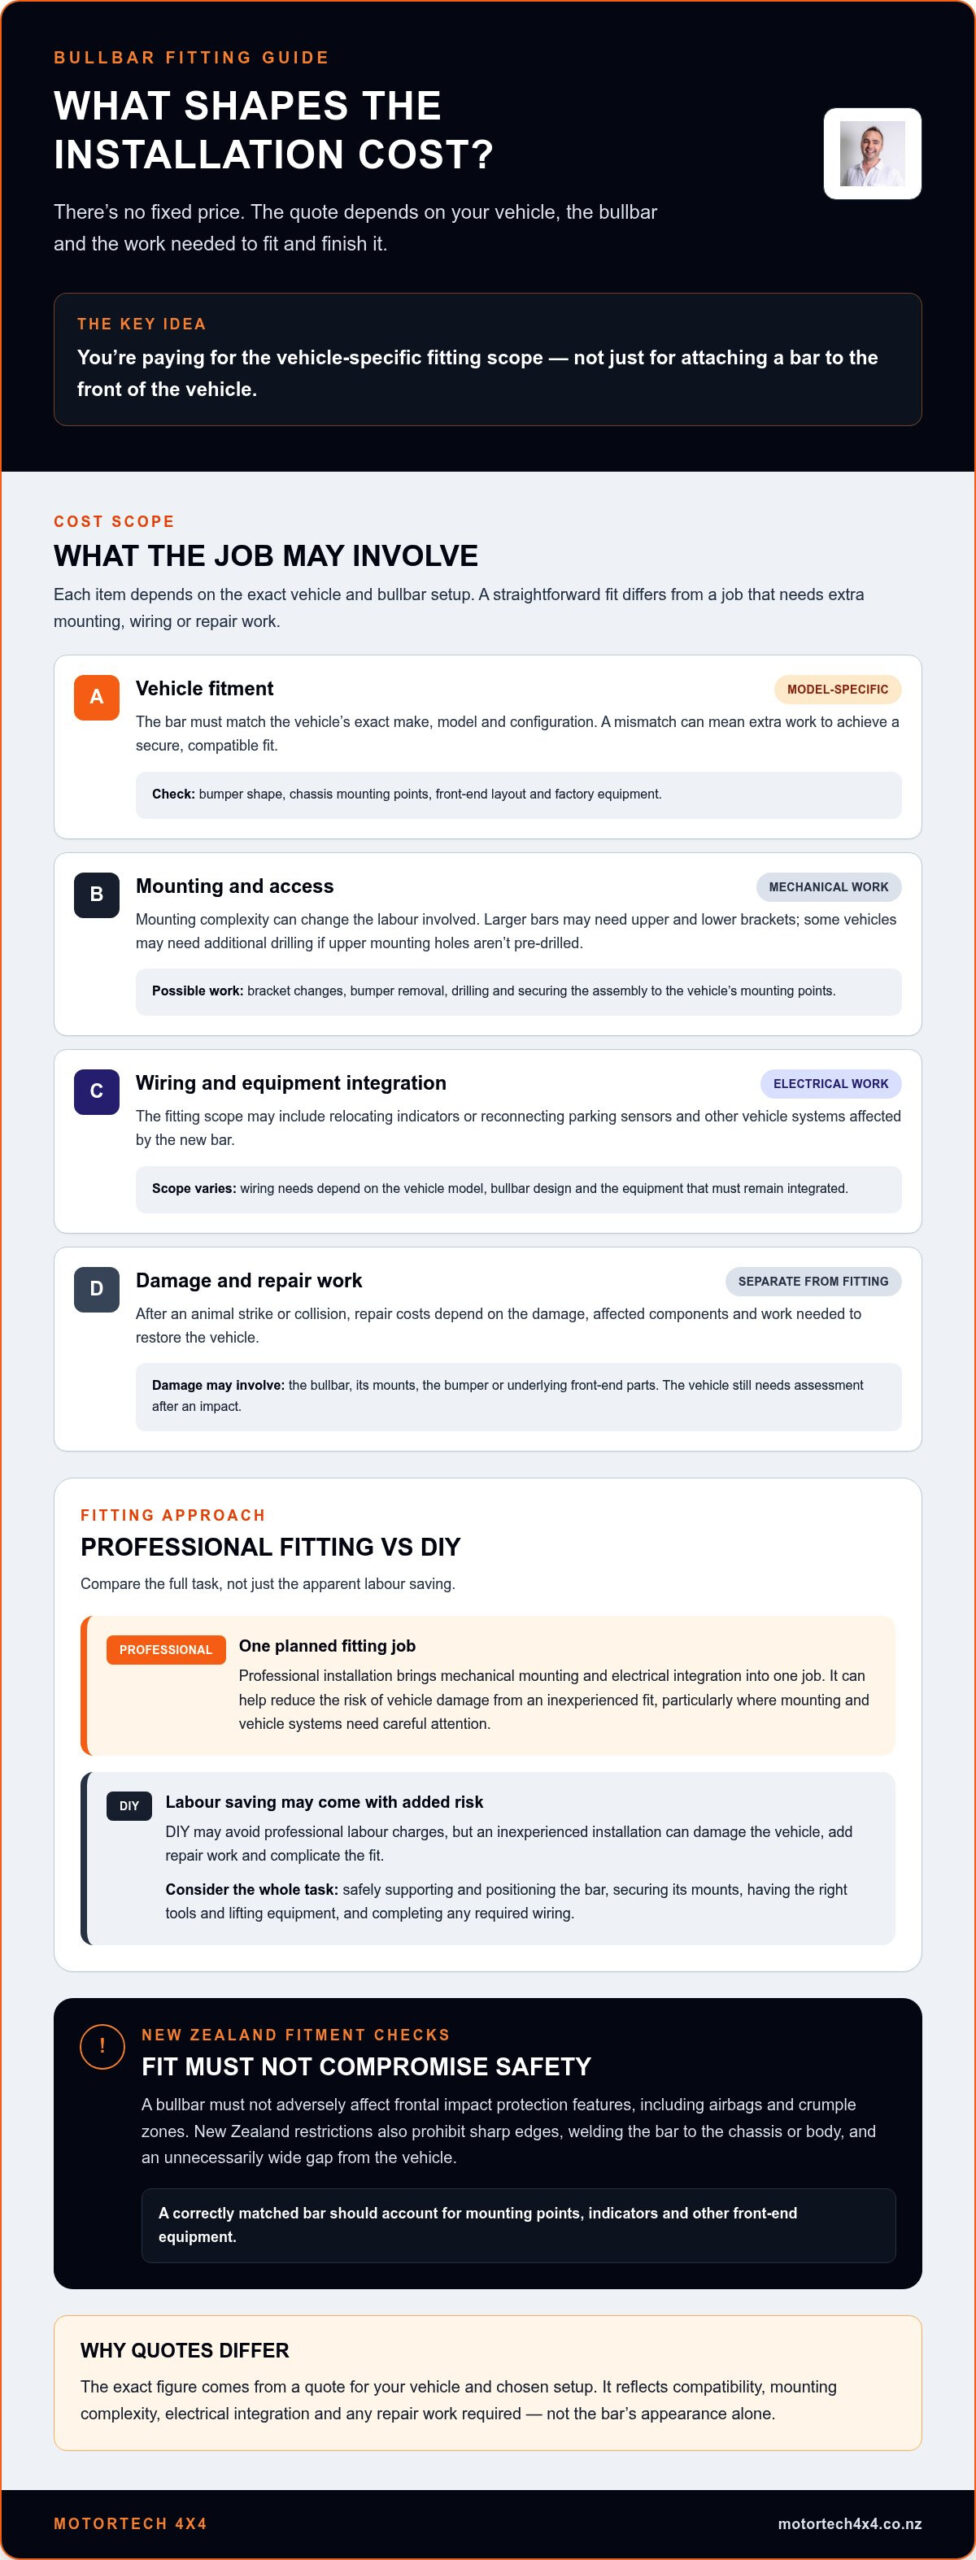
What affects bull bar prices and installation costs? Vehicle fitment, mounting complexity, electrical integration and repair work all shape the job. The exact figure is provided in a quote for your vehicle and chosen setup.
Factors Affecting Installation Costs
Installation costs reflect the labour and vehicle-specific work needed to mount and finish the bar. A straightforward fit differs from a job involving bracket changes, bumper removal or extra wiring. The vehicle and work required, not the bar’s appearance alone, determine the fitting scope.
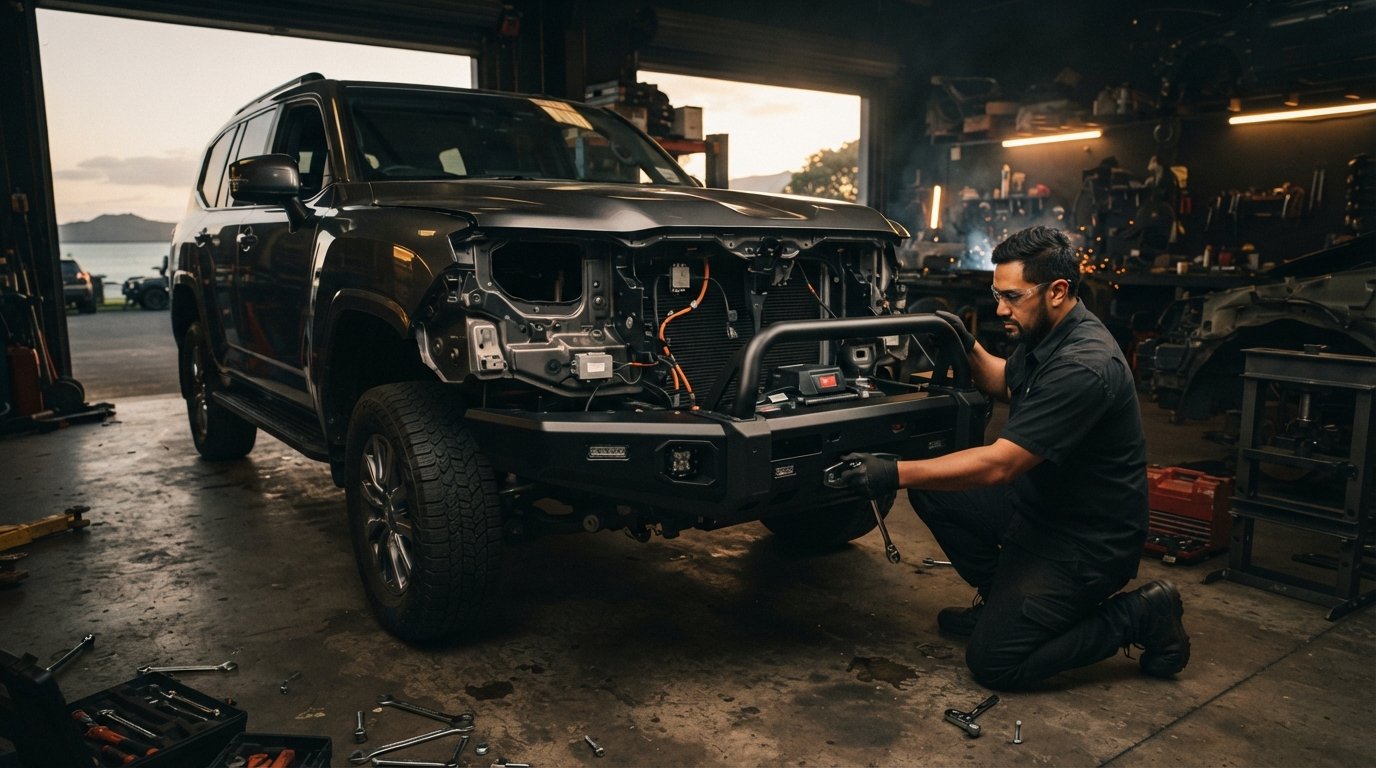
Professional fitting involves more than attaching a bar to the front of a vehicle. The installer must work with the vehicle’s mounting points and account for the bumper, indicators and other fitted equipment. A bull bar designed for a different model may need additional work to achieve a secure, compatible fit. An Australian vehicle imported into New Zealand still needs assessment against its exact model and configuration.
DIY may avoid professional labour charges, but an inexperienced installation can damage the vehicle. Fitting damage can add repair work and complicate the installation. Compare the apparent labour saving with the tools, lifting equipment, mounting knowledge and electrical work your vehicle requires. Weigh the full DIY task against a professional fit, not labour alone.
Additional Wiring and Sensor Costs
Electrical work covers the wiring and system adjustments needed when a new bar changes how front-end equipment is mounted or connected. Indicators, parking sensors and other vehicle systems need to remain properly integrated after fitting.
For example, relocating an indicator or reconnecting a sensor adds work beyond mounting the bar. Wiring needs vary by vehicle model and bullbar design, so the fitting scope should reflect the actual electrical work. Reconnecting several components involves different tasks from a basic mechanical fit.
After an animal strike or collision, repair costs depend on the damage, affected components and work needed to restore the vehicle. Damage may involve the bull bar, its mounts, the bumper or underlying front-end parts. A bull bar doesn’t remove the need to assess the vehicle after an impact. Repairing or replacing damaged equipment is separate from the original fitting work.
Professional installation is recommended because incorrect fitting can damage the vehicle. It also brings mechanical mounting and electrical integration into one planned job. Before choosing DIY, consider whether you can safely support and position the bar, secure its mounts and complete any wiring. If the job involves unfamiliar sensors or vehicle systems, professional fitting can address those tasks as part of the installation.
For a vehicle-specific starting point, review bullbar fitting options alongside your vehicle’s equipment and intended use. That information helps frame the fitting requirements and the work a quote needs to cover.
Installation process and safety checks
An incompatible bull bar or incorrect fitting can damage the vehicle and adversely affect frontal impact protection. In New Zealand, a bar must not compromise features such as airbags or crumple zones, so check fitment and safety before driving.
Installation starts by matching the bar and its mounting system to the vehicle. The fitter needs to account for the exact model, existing front-end equipment and supplied brackets. A mismatch can leave mounting points unsuitable or require extra work. The fitment plan should also identify whether indicators, parking sensors or other equipment sit in the bumper area.
Once compatibility is established, fitting involves securing the bar to its intended mounting points and integrating any affected equipment. The work must not involve welding an aftermarket bar to the vehicle’s chassis or body, which New Zealand restrictions prohibit. The installed bar must not leave an unnecessarily wide gap from the vehicle.
After mounting, inspect the bar’s position and edges. New Zealand restrictions prohibit sharp corners or edges. A suitable bar should have rounded edges, airbag compatibility and properly positioned indicators. These are practical checks as well as design considerations: an obscured or poorly positioned indicator can make the vehicle’s signals harder for other road users to see.
Airbag compatibility needs particular attention. A bull bar can alter how a vehicle’s front end responds in an impact. If fitting adversely affects frontal impact protection features, including airbags or crumple zones, the installation is unsuitable. The vehicle’s exact design and the bar’s compatibility matter more than a general claim that it suits a particular vehicle class.
Before driving, confirm that the bar is secure and sits correctly against the front of the vehicle. Check that indicators remain visible and that affected sensors or wiring work as intended. A loose mount, misaligned bar or disconnected component can create problems beyond appearance. Inspect the complete fitted assembly, not just the bolts that are easiest to see.
Modification also raises a warranty consideration. Altering a bull bar may void its manufacturer’s warranty, so don’t treat cutting, drilling or reshaping as routine fitting adjustments. Correctly matched parts reduce the need for such changes. Resolve any fitment issue before work proceeds.
Keep the vehicle-specific fitment details with the installation record. Note the bar model, brackets used and any indicator or sensor changes. This information helps identify the installed configuration during later maintenance or repairs. Careful assessment, secure mounting and a final safety inspection help keep the fitted bar appropriate for New Zealand roads and protect the vehicle’s systems.
DIY installation
DIY fitting can reduce labour costs, but a bull bar is a substantial component, not a simple trim accessory. A steel bar typically weighs 30 to 80 kg, while an alloy bar weighs 15 to 40 kg. That difference affects how easily drivers can position and support the bar during installation.
Steel bull bars take more time and effort to install than lightweight plastic or aluminium bars. Before starting, compare the vehicle’s exact model with the bar’s fitment instructions and parts. Check that the supplied brackets match the intended mounting points. A mismatch can turn a planned installation into extra work or leave the bar incorrectly supported.
Read the manufacturer’s installation instructions before removing the vehicle’s bumper. Identify the fasteners, brackets and electrical connections involved. Keep removed parts organised, and don’t force a bracket into position. If the bar doesn’t align with the vehicle’s mounts, stop and reassess the fit rather than altering the bar or vehicle without guidance.
Lifting and positioning require particular care. A heavy steel bar can shift as it is raised, placing strain on the person holding it or damaging the vehicle’s bodywork. Arrange suitable assistance and stable support before loosening the original bumper. The same planning applies to an alloy bar, even though it is typically lighter.
Electrical integration can add complexity to a home installation. A bull bar may affect the position or connection of indicators, parking sensors or other front-end equipment. Account for those components when following the manufacturer’s instructions. A mechanically secure bar is not a complete fit if affected equipment is disconnected or obstructed.
New Zealand requirements also shape the work. An aftermarket bull bar must not adversely affect frontal impact protection features such as airbags or crumple zones. Restrictions prohibit sharp corners or edges, welding an aftermarket bar to the chassis or body, and an unnecessarily wide gap between the bar and vehicle. These requirements apply to both DIY and professional fitting.
Incorrect installation can damage the vehicle, and modifications may void the bull bar manufacturer’s warranty. Cutting, drilling or reshaping to overcome a fitment mismatch can create both risks. Follow the instructions for the exact bar and vehicle, and don’t treat improvised changes as a substitute for compatible parts.
DIY is most suitable when the vehicle and bar have a clear fitment match, the mounting process is within your capability, and you can handle all affected equipment correctly. If the job involves unfamiliar electrical work, difficult lifting or modifications, professional installation is more appropriate. Weigh the labour saving against the work, tools and risk of damage involved.
DIY versus professional installation
The main trade-off is labour savings versus installation risk. In New Zealand, also account for correct mounting, electrical integration and frontal impact protection, not labour alone.
DIY suits a vehicle and bull bar with a clear fitment match, accessible mounting points and manageable installation requirements. Follow the manufacturer’s instructions and safely support the bar while aligning its brackets. A plastic or aluminium bar may be easier to handle than a steel one, but lighter weight doesn’t remove the need for accurate mounting.
Professional fitting is more appropriate when the job involves unfamiliar mounting hardware, wiring or vehicle sensors. For example, a bar that changes the position of indicators or parking sensors adds work beyond securing the assembly. A professional fit can address those connected tasks as part of the installation, reducing the chance of leaving a system disconnected or obstructed.
Assess the full DIY task before treating it as a simple saving. Consider whether you have the equipment to hold the bar securely, can follow the vehicle-specific instructions and have the experience to reconnect affected electrical components. If any step requires improvised drilling, cutting or reshaping, the job is no longer a straightforward fit.
New Zealand safety requirements apply to both methods. A fitted bull bar must not adversely affect frontal impact protection features such as airbags or crumple zones. Restrictions also prohibit sharp corners or edges, aftermarket bars welded to the chassis or body, and an unnecessarily wide gap from the vehicle’s shape. Professional installation doesn’t replace the need for a compatible bar, but it can help address the technical work required for proper fitment.
Consider what could happen if installation goes wrong. A poorly positioned bracket can cause damage during fitting, while incorrect electrical connections can affect indicators or sensors. Modifying the bar may also void the manufacturer’s warranty. Weigh those risks against potential correction work, and consider your tools and experience in light of the vehicle’s actual installation requirements.
For a simple, well-matched setup, a capable DIY installer may be comfortable following the manufacturer’s process. For a complex fit, or one involving sensors and unfamiliar mounting points, professional installation is the sounder choice, as professional fitting is often safer. The fitting price depends on vehicle compatibility, mounting complexity and electrical work, with the exact figure provided in a quote for your case.
Compare bullbar options for your vehicle before deciding which installation approach suits the fitment requirements.
Motortech 4X4: Suspension Kits
Motortech 4X4 is a practical next step if you’re weighing bullbar fitment alongside other 4×4 modifications. Its range includes Bullbars, Suspension Kits, Snorkels and GVM Upgrades, helping you consider related equipment as part of your vehicle setup. A bullbar decision can affect more than appearance, so it’s useful to assess the vehicle, intended use and other planned modifications together. Suspension Kits may be relevant when planning a broader setup, while a GVM Upgrade addresses a different vehicle requirement. The right choice depends on what you want the vehicle to do and how its components work together. For guidance on bullbar fitment and related upgrades, contact Motortech 4X4 or visit motortech4x4.co.nz.
Plan your next vehicle upgrade
Choosing a bullbar is an opportunity to plan your vehicle’s front-end setup around how you use it, rather than treating installation as an isolated job. If you’re still weighing how much a bullbar installation costs, focus on the vehicle-specific work and the equipment you want to integrate. That gives you a clearer basis for choosing a setup suited to your driving and future modifications.
Motortech 4X4 offers Bullbars, Suspension Kits and Snorkels, giving you options to consider as part of a broader 4×4 setup. Whether you’re planning a bullbar fit or looking at related upgrades, the next step is to discuss your vehicle and intended use.
Contact Motortech 4X4 to talk through your bullbar and upgrade requirements. A considered plan can help you move forward with confidence.
Frequently Asked Questions
The Economics of a Bull Bar: Is It Worth the Investment?
A bullbar may be worthwhile if its purpose suits your vehicle use and driving conditions. Assessing how much a bullbar installation costs is only one part of the decision: also consider the vehicle’s compatibility, any required electrical work and how the added equipment fits your overall setup. For a vehicle mainly used in town, those priorities may differ from a 4WD regularly driven on rural roads. The right choice depends on the use case.
What are the legal restrictions?
In New Zealand, a bullbar must not adversely affect frontal impact protection features such as airbags or crumple zones. Restrictions prohibit sharp corners or edges, aftermarket bars welded to the vehicle’s chassis or body, and an unnecessarily wide gap between the bar and vehicle. A suitable bar should have rounded edges, airbag compatibility and properly positioned indicators. These requirements apply to the bar’s design and fitted position, not just the vehicle category.
How long does bullbar installation take, and what does the fitting process involve?
Fitting time depends on the vehicle’s mounting arrangement and the work needed to integrate equipment. The process typically involves preparing the front end, securing compatible mounts, positioning the bar, and addressing affected wiring, indicators or sensors. A vehicle needing additional bracket work or electrical integration involves more tasks than a direct mechanical fit. The completed installation also needs checks for secure mounting, correct alignment and unobstructed equipment.