
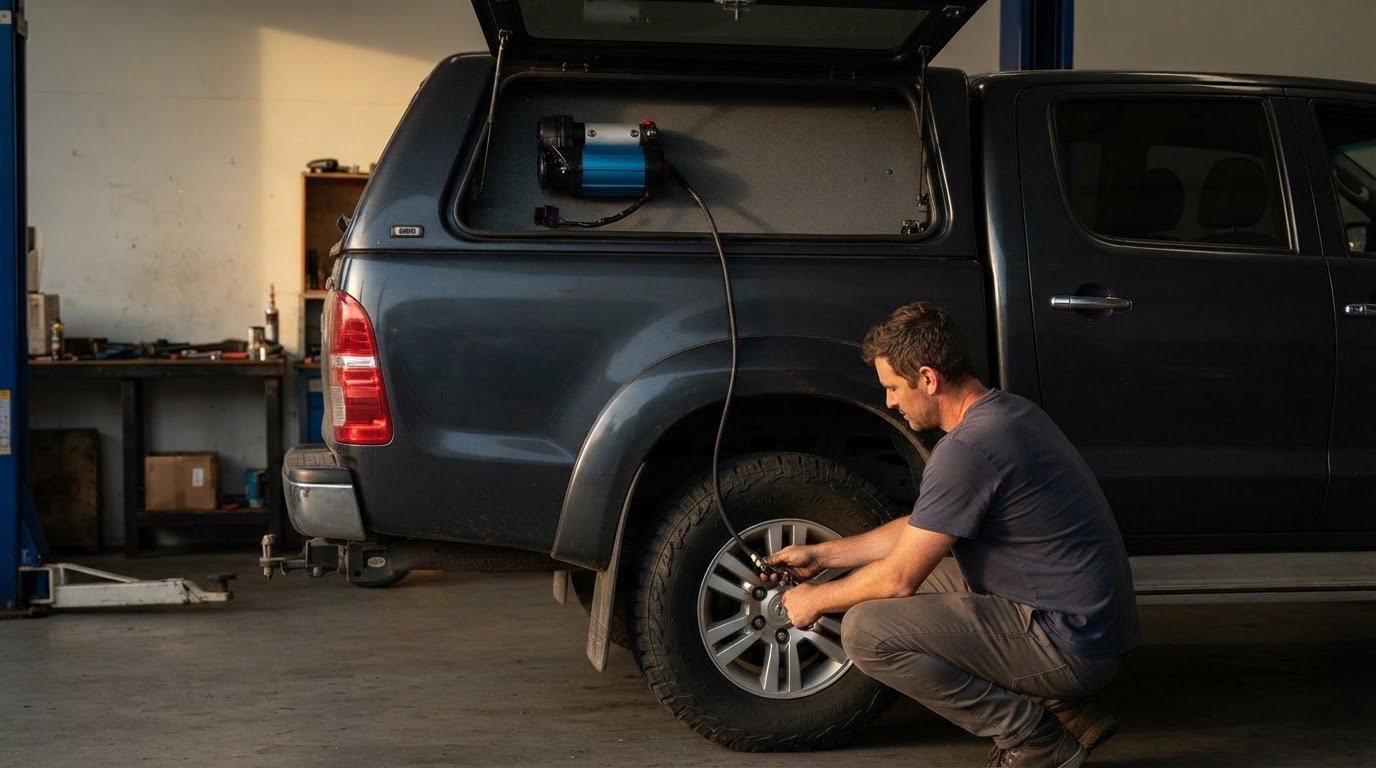
A safe 4×4 air compressor installation starts with the manufacturer’s approved mounting orientation. Keep the compressor away from heat sources and flammable materials, then secure the 12V unit where its hose can reach all four tyres. These choices help make inflation more practical without compromising the installation.
It’s easy to focus on where the compressor will fit, but its position, mounting surface and power connection all matter. A tidy setup should also leave the compressor accessible and its hose straightforward to use when you need to adjust tyre pressures.
This guide explains how to check orientation instructions, choose a suitable spot in your canopy and plan a permanent 12V mount. You’ll also learn what to consider when positioning the hose and connecting the compressor, so you can approach the job methodically and recognise when a professional installation is the better fit.
Key Takeaways
- Use the compressor manufacturer’s orientation guidance to choose a suitable mounting position.
- Position the compressor so heat stays clear of flammable items in the canopy.
- Plan the hose route around easy access to each tyre before fixing the compressor in place.
- For a permanent 12V setup, consider how the mount, power connection and canopy layout work together.
Checking manufacturer guidance on compressor orientation
- Find the model-specific instructions. Before choosing a canopy location, identify the compressor model and read its installation manual. Check the orientation diagrams, mounting notes and any warnings about operation. A 4WD compressor should only be mounted in an orientation approved by its manufacturer, because changing its designed orientation could cause damage.
- Match the diagram to your proposed position. Compare the manual’s illustrations with the compressor’s actual mounting points and the space available in your canopy. Don’t assume a unit can be turned onto its side or upside down because the bracket fits. If the instructions show more than one permitted position, use one of those positions.
- Check the mounting surface and clearance. Lay out the compressor and its fasteners before drilling. Confirm that the base can sit securely in the approved orientation, and that nearby panels, stored gear or wiring won’t obstruct access. Follow any clearance or ventilation directions in the model’s manual rather than relying on appearance alone.
- Apply New Zealand safety requirements to the installation. Use the manufacturer’s instructions for compressor orientation and follow applicable New Zealand electrical-safety requirements for the 12V wiring. Keep the wiring protected and arrange the installation so the compressor’s electrical connections remain accessible for inspection.
- Compare compressor types by their workload. A piston compressor suits intermittent tasks, while a rotary screw compressor is designed for sustained airflow. For a 4×4 workshop, compare the airflow and duty cycle required by the tools you’ll run, not just the compressor’s headline pressure.
- Size the unit around the equipment. List the intended jobs, such as tyre inflation or operating air tools, then compare each tool’s airflow demand with the compressor’s delivered airflow. Include how often tools will run together; pressure alone doesn’t establish whether a workshop compressor is suitable.
- Establish the installation cost factors. In New Zealand, installation cost depends on compressor choice, mounting requirements, wiring and any receiver tank; a price is given after a quote request. Record these details before planning the final layout.
Keeping a hot compressor away from flammable items
- Choose a clear mounting area. Before fixing the compressor in place, remove fuel containers, aerosol cans, oily rags, paper and other combustible gear from its immediate surroundings. A canopy can become crowded quickly, so plan the compressor position alongside regularly carried equipment, not just the empty space available during installation.
- Keep heat-producing parts away from stored gear. A compressor can become hot during operation. Avoid mounting it beside items that could touch its hot surfaces, and don’t let bags or loose equipment shift against the unit while driving. Secure stored items separately so they can’t block airflow or contact the compressor.
- Allow ventilation around the unit. Compressor ventilation and clearance requirements vary by model. Follow the manufacturer’s instructions for the specified clearances and airflow, and don’t enclose the unit in a tight compartment unless its instructions permit that arrangement. Leave access to the intake and cooling areas.
- Route hoses and wiring away from hot surfaces. Check the full path from the compressor to the tyre connection and power supply. Keep hoses clear of sharp edges and moving parts, and prevent wiring from resting against hot components. Secure both routes so vibration and canopy movement won’t pull them loose.
- Consider sound and vibration before drilling. An unsuitable mounting surface can transmit operating noise through the canopy or vehicle body. Use the mounting method specified by the manufacturer, then check that the compressor sits firmly without loose panels or stored tools rattling against it.
- Plan for moisture management. Compressed air can carry moisture, which may collect in hoses or connected equipment. Keep the installation accessible for inspection, and follow the compressor instructions for draining or maintaining any air receiver. Don’t store electrical connections where water can pool.
- Review the layout before use. Check that flammable items remain separated, airflow paths stay open and the unit is secure. A professional layout can account for heat, wiring and canopy storage together; explore 4×4 installation planning for an integrated setup.
Making tyre inflation quicker and easier
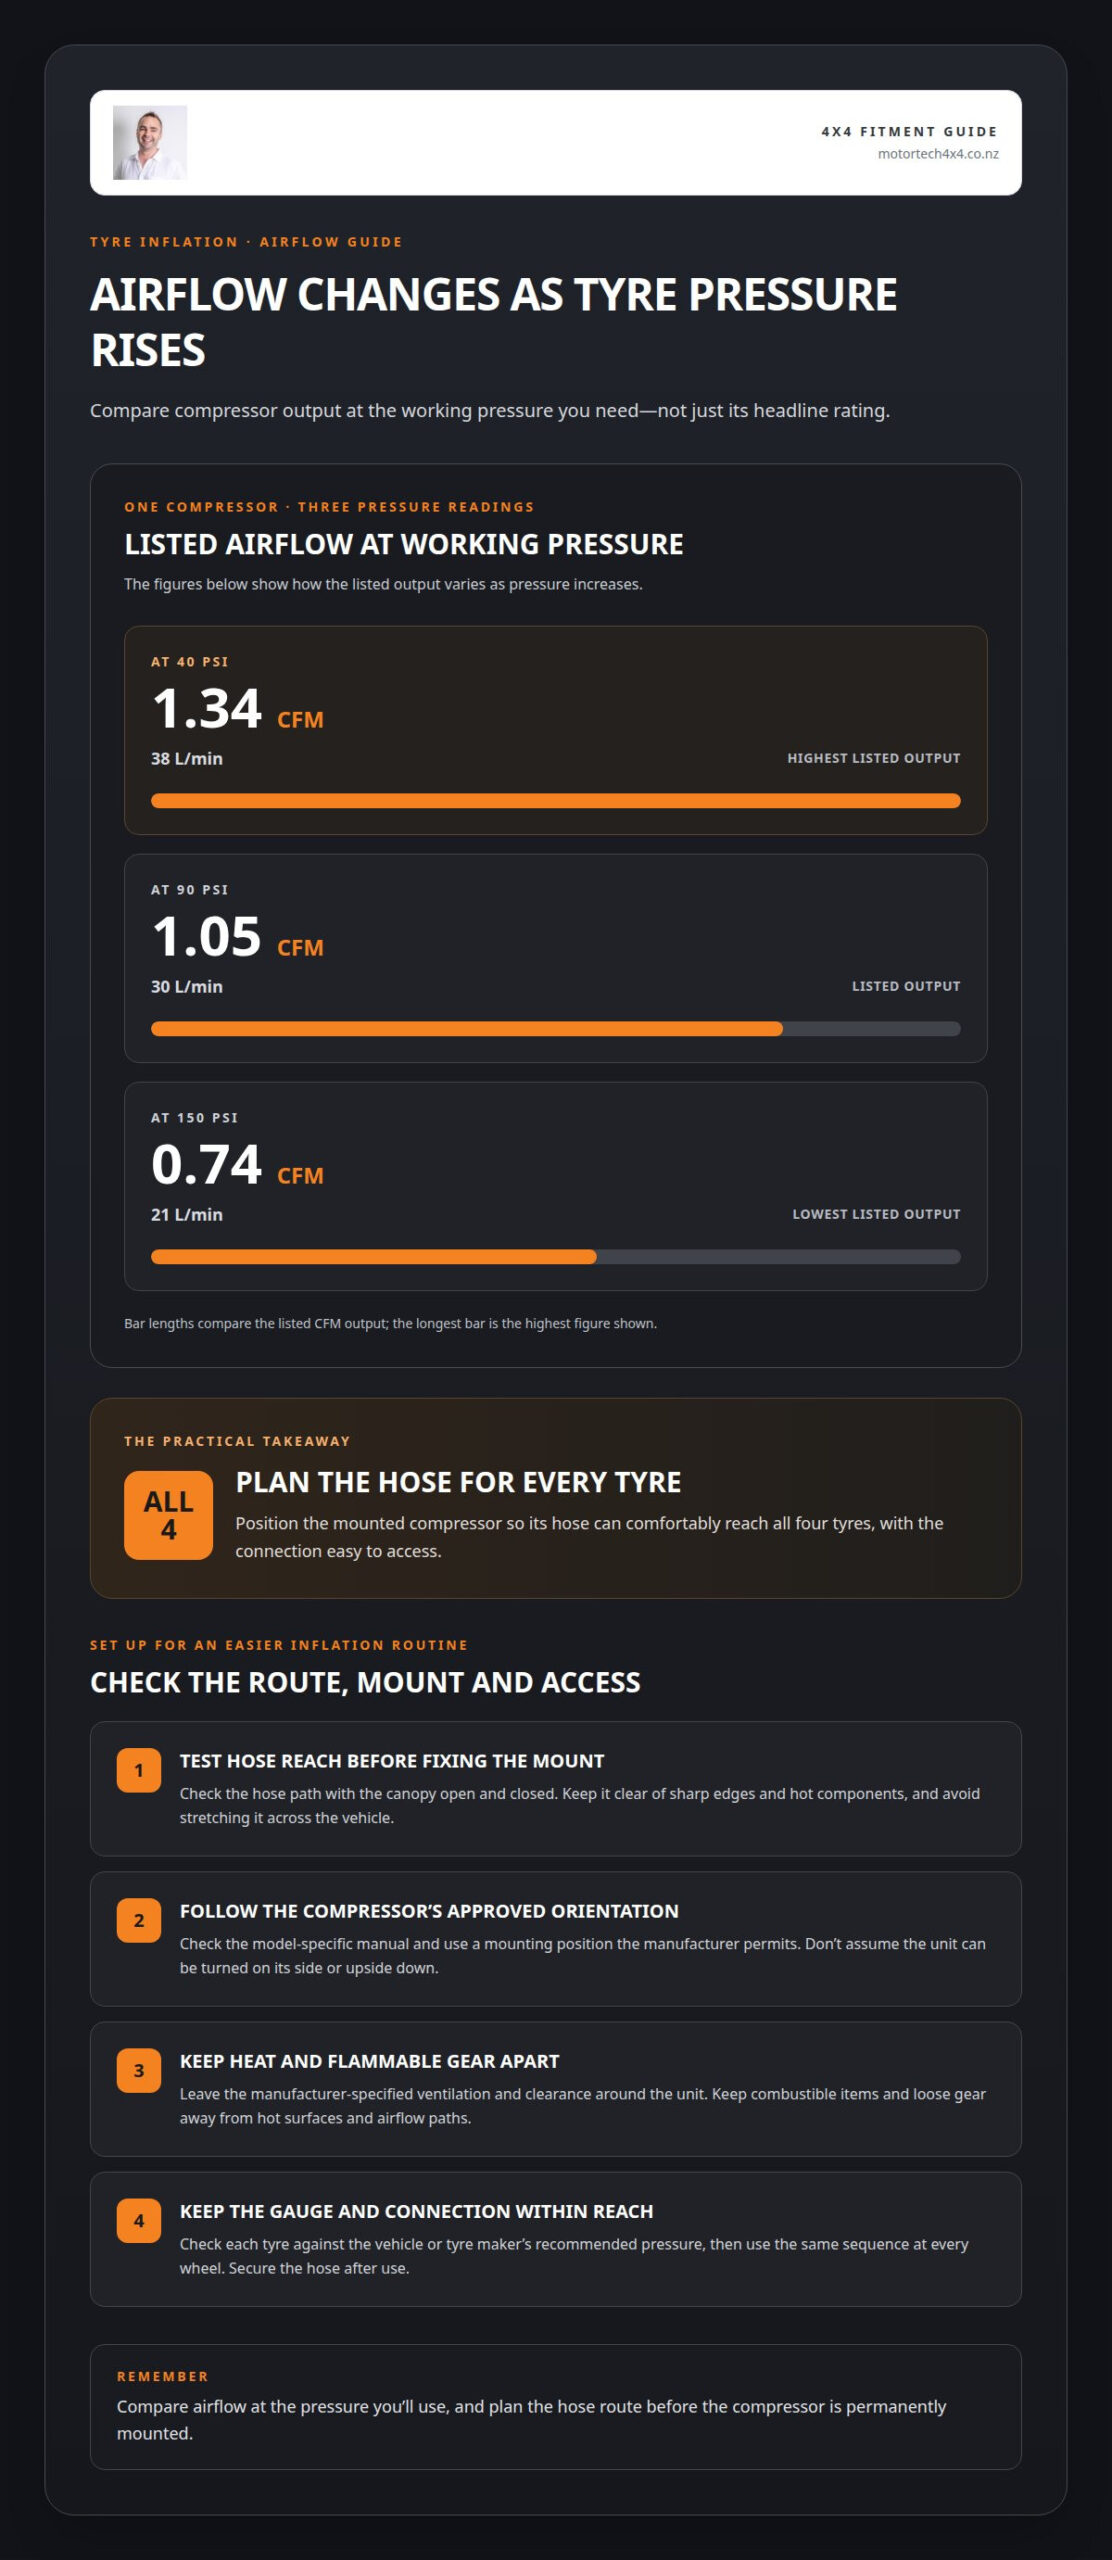
- Plan the hose route around all four tyres. Choose a mounting position that lets the hose reach each wheel without stretching across sharp edges or hot components. A mounted compressor hose can comfortably reach all four car tyres. Test the route with the canopy open and closed, and keep the connection easy to reach.
- Compare airflow at working pressure. Compressor output changes as pressure rises, so assess the figures relevant to tyre inflation rather than relying on a single headline rating. One compressor produces 1.34 CFM (38 L/min) at 40 PSI, 1.05 CFM (30 L/min) at 90 PSI and 0.74 CFM (21 L/min) at 150 PSI. This helps you assess whether the unit suits your intended use.
- Use a suitable gauge and repeatable routine. Keep the pressure gauge with the hose or in an accessible storage spot. Check each tyre against the vehicle or tyre maker’s recommended pressure, then use the same sequence at every wheel. An air compressor installation 4×4 drivers can use efficiently should make the gauge and controls straightforward to reach.
- Keep connections within reach. Arrange the air hose connection so you can attach it without unloading canopy gear. Secure the hose after use, and route it so it won’t snag on a door, drawer or other equipment. A clear connection point also makes it easier to pack away the setup consistently.
- Allow for pauses during inflation. Follow the compressor’s operating instructions, including any duty-cycle limits. Keep the unit’s intake and cooling areas unobstructed while it runs. If the compressor needs a pause, use that time to move the hose to the next tyre or check the pressure on an inflated tyre.
- Check the complete setup before leaving. Confirm the hose reaches each wheel, the gauge reads clearly and the fittings connect securely. After inflation, disconnect the hose carefully and store it clear of hot parts. Planning an air compressor installation 4×4 owners can operate comfortably means considering access, hose storage and controls together.
Permanently mounting a 12V compressor in a 4WD canopy
- Map the canopy layout. Choose a position that leaves room for stored equipment, keeps the compressor accessible and allows its hose to reach the tyres. Check the proposed spot against the canopy door, drawers and existing wiring before drilling. Mark the mount only after confirming these clearances.
- Prepare a secure mounting plate. One installation used 100 x 6 mm aluminium flat bar to support the compressor. Treat this as an example, not a universal specification: the plate and fasteners must suit your compressor, canopy structure and mounting points. Secure the assembly against movement on corrugated roads.
- Plan the 12V electrical supply. In New Zealand, a 12V compressor needs a compatible 12V vehicle supply. Select cable, connections and circuit protection to suit the manufacturer’s instructions and the compressor’s current draw. A 12V Sherpa compressor has a maximum power draw of 23A, so account for that load when planning its circuit.
- Keep the connection practical. A permanent installation can remain connected using Anderson plugs. Position the plug where it’s accessible for disconnection and protected from knocks, dirt and moisture. Route cables away from sharp edges, moving components and hot surfaces, then secure them so vibration cannot pull on the terminals.
- Check the mount before final use. Tighten the fasteners, inspect the cable route and confirm the compressor sits firmly. Test the installation with the canopy open, then closed, to make sure doors and stored gear don’t interfere. A 12V compressor installation has taken about an hour in one example, though the layout and mounting work determine the job.
- Test operation and access. Run the compressor according to its instructions, then check that the plug, controls and hose connection remain reachable. Make sure the cable doesn’t become trapped when canopy fittings move. If you want a professionally planned vehicle setup, arrange a 4×4 installation.
Motortech 4X4: Suspension Kits
Motortech 4X4 is a natural next step if your canopy setup forms part of a wider vehicle build. A suspension kit may be relevant when you’re planning changes to how your 4×4 is equipped or used. Consider the complete setup, including any bullbar, snorkel or GVM upgrade you’re planning, rather than treating each modification in isolation.
Turn to Motortech 4X4 when you’re ready to discuss suspension kits for your vehicle or coordinate them with other listed modifications. A considered plan helps you make decisions in context, alongside the compressor position and canopy layout covered above.
Contact Motortech 4X4 or visit motortech4x4.co.nz to discuss your vehicle setup.
Plan the next stage of your 4×4 build
A canopy compressor can be one part of a broader vehicle setup. For commercial service vehicles or work utes that integrate heavy-duty pneumatic or hydraulic gear, truck equipment specialists such as Tim Halpin Equipment illustrate how functional equipment can be packaged securely alongside daily cargo. Before committing to an air compressor installation for your 4×4, consider how the canopy arrangement fits your intended use and any future modifications. Planning those decisions together can help keep the overall build coherent as your requirements change.
Motortech 4X4 offers Suspension Kits, Bullbars and Snorkels for drivers considering wider vehicle modifications alongside their canopy setup. The right next step depends on what you want your vehicle to do, and which changes make sense as part of that plan.
If you’re ready to discuss the installation or the wider setup, contact Motortech 4X4 about your install. A considered plan gives you a clear starting point for building a capable 4×4.
Frequently Asked Questions
What NZ regulations and safety standards apply to air compressor installation?
Follow applicable New Zealand electrical-safety requirements for the 12V wiring, protect the wiring and keep electrical connections accessible for inspection. Use the compressor manufacturer’s approved mounting orientation and instructions.
How much does air compressor installation cost in New Zealand?
Installation cost depends on the compressor, mounting requirements, wiring and whether a receiver tank is included. Request a quote to get a price.